Tuesday, October 27, 2015

Q & A Ramblings


For those of you who like to read, I thought it would be fun to address here on the Robinson Edge a few of the most frequently questions that I get asked about my knives and knife making in general.  I have no doubt that those of you who make knives get asked many of these same questions, so they really aren’t unique to me, but I thought it would be entertaining and maybe informative to post them here.  Maybe I’ll even start a new page for reference.

Question:  Where do you get your blades?

Answer:  This is probably the most frequently asked question that I get about my knives, and possibly the most amusing to answer.  I think many people out there are familiar with “kit” knives that one can purchase which are essentially finished knives that just need to be assembled and maybe some light sanding and finish work.  You should see people’s faces as I tell them that I make my blades.  I usually get that “I don’t believe you” look in return.  I guess many people don’t believe that someone can make a knife in a home shop.  Depending on how truly interested they are in knowing the full answer to this question, I may go into detail to explain how I make all of my blades, and other parts for that matter, from bars of raw steel.  I may delve into steel choices, blade design, heat treatment procedures, and a myriad of other topics regarding knife blades.  Or, if they really don’t want to know the whole answer to their question, I may just say a simple, “Yup, I make them.”

Question:  Why do your knives cost so much?

Answer:  This is always the hardest question to answer since you are either familiar with custom handmade knives or you aren’t.  Some people don’t see much point in spending a lot of money on something they can pick up at Wally World for twenty bucks.  Let’s face it, if all you want is a tool to pick out splinters, clean your fingernails, or open you mail, then a $20.00 production knife might be the right choice.  If you’re looking for a unique, one-of-a-kind piece of edged art that can be handed down to your grandchildren as an heirloom, then a hand-made knife is the only way to go.  I have come up with two analogies that help explain what a custom knife is in comparison to a production knife from the hardware store.

The first analogy is to compare a knife to a car.  You can purchase an old, used and abused truck from an old farmer for a few hundred bucks, or you can buy a new car off the lot for tens of thousands.  You can even take this analogy a step further and buy a custom-made car for hundreds of thousands of dollars from a well-known, well-respected shop.  So why by the new car or more specifically why buy the custom made sports car?  For someone simply looking to get from point A to point B, the old truck will get the job done.  The gears may grind, the steering may wander a bit, the passenger side window might not go down all the way, and there may be an odor that emanates from the back seat that won’t go away no matter how much air freshener you spray, but it will get you home in one piece; a little frazzled albeit, but still in one piece.  The new car off the lot steers perfectly, everything operates and functions as designed, and it comes with that new car smell.  But, still, it looks just like that car the neighbor across the street uses to drive her kids to soccer practice.  It might be a different color, but it’s still the same car.  Now, for those true car lovers, the few who have the means and the wherewithal, the custom car comes with prestige, assurance that only the finest materials and craftsmanship were used, it’s the only one in town like it, and that feeling that you get as you are forced back into your seat when you romp on the throttle is priceless.

The second analogy I use is to compare a knife to a quilt.  You can go to Wally World and purchase a blanket off the shelf for twenty or thirty bucks or you can purchase a handmade quilt from an experienced quilter for hundreds or even thousands of dollars.  Both quilts will cover your bed and keep you warm at night.  The difference lies in the materials, time, and craftsmanship that went into the production.  The Wally World blanket was made with the cheapest materials, by unskilled labor somewhere overseas and treated as just another commodity.  The handmade quilt is made with the very finest textiles, cut and fit in the most intricate and artistic of patterns by hands that are full of experience, wisdom and care.  The first, you get a blanket, the second, a true piece of art.

It’s all about what you want out of a knife.  If you want something truly unique, handcrafted out of the finest materials in the most caring of ways by hands that are attached to a true artisan, you want a handmade, custom knife.  If you want something to open your UPS package, a sharpened piece of rebar will do.  It’s all about the value you place on the item.

Whew!  That was a long answer.

Question:  Why do your knives cost so little?

Answer:  I don’t get this question near as much as the one above, but it certainly bears mentioning.  For those people who are familiar with the world of custom knives, to them my prices seem incredibly low relative to other makers out there.  There are a couple of reasons that I attribute my low prices to, the first of which is that I am a relatively new maker.  I assume that the more exposure my knives get, the higher the prices will go.  A few years from now my prices may be two or three times what they are now as my name becomes more recognizable and the resale value of my knives climbs.  The second reason my prices are so low is the simple fact that I love to make knives.  I make them as a fun hobby and not as a business hoping to get rich someday.  My goals are to clear actual materials cost and make enough per knife to buy materials to make the next one and keep my tools in good repair, and maybe buy enough soda to keep me hydrated while out in the shop.  I will say that if at any time you want to purchase one of my knives for a higher price that I have it listed for, please let me know.  I’d be more than happy to negotiate (wink, wink).

Question:  What are those scales made out of?

Answer:  This question obviously varies with each knife and how flamboyant and colorful, or simple and elegant the material used may be.  I use mostly natural materials for the scales on my knives, but I also use a little of the manmade stuff.  I use a lot of wood, some mammoth ivory and tooth, mother of pearl, as well as horn and antler.  Much of the wood I use is professionally stabilized which makes it resistant to cracking, moving, and less prone to problems when exposed to water.  The only synthetic material that I have used so far is Micarta (phenolic resin material).  It’s a good choice for a knife that is used around a lot of water since this stuff is hydrophobic and doesn’t swell or shrink; it’s nice and stable.  I don’t like most synthetic materials since they tend to look a little gaudy and far too much like plastic (since they are plastic).  I heard it said once referring to a plastic material as “Mother of toilet seat.”  That name and descriptive language conjures up quite the image in my mind and has stuck with me since I first heard it.  It’s just a personal preference I guess, but I don’t use much beyond the simple colors of Micarta when it comes to manmade materials.

Question:  What kind of tools do you use?

Answer:  I think people expect me to tell them of all the highly automated, highly specialized and expensive equipment that I have in my shop.  If you’ve taken the time to visit my “Shop Tour” page here on the Robinson Edge, you will see that I have none of that stuff in my little converted garden shed I call my shop.  My tools are very basic, tools that most do-it-yourselfers would have in their garage already.  All of my larger tools are small bench-mounted versions of a drill press, band saw, buffer, disc grinder, mini wood lathe, and the two specialized pieces of equipment, my belt grinder and heat treat oven.  I also use a small bunch of hand tools such as files, a rotary tool, taps, reamers, clamps, and a few others.  It really doesn’t take a lot of specialty tools to make a good knife, just a few basic ones.  I admit that if I was making knives as a business and looking to make a large profit, my tooling would be much different, but for my hobby shop, I’ve got all that I need.

That’s enough Q&A for now.  Like I said before, I may add a dedicated FAQ page here on my blog just for kicks and giggles.  I hope I haven’t bored you to death with my ramblings, but if you’re reading this, the last paragraph of this post, you must have muddled through alright.  I hope this has been entertaining and maybe even informative.  Thanks for stopping by the Robinson Edge.

- Brandant Robinson

Monday, October 26, 2015

New Table and New Knife

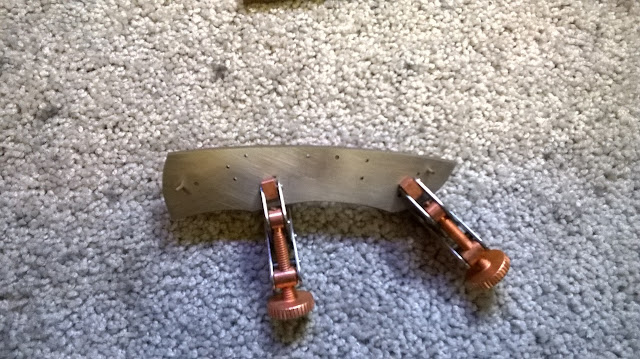
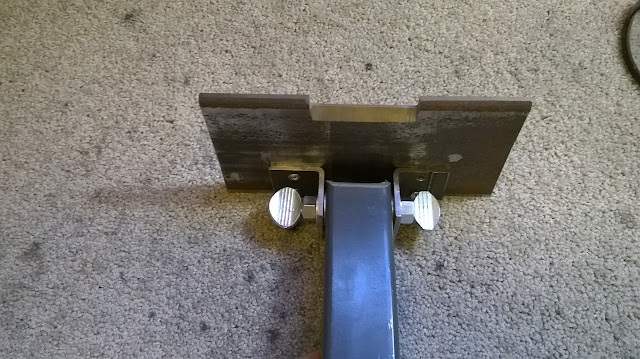
Before I started a new knife, I finally took some time to build a new tool rest table for my 2x72 grinder.  Ever since I built my grinder, I've been meaning to make a new table.  I've been working off a tiny, 1-1/2" x 1-1/2" table that is frankly just too small.  Besides the size, my main problem with the small table was that it isn't exactly 90 degrees to my platen.  So, I made a new table that is significantly larger and I made it adjustable.  Here is what I came up with.

As you can see from the photo, I made the table so that it tilts both up and down.
 
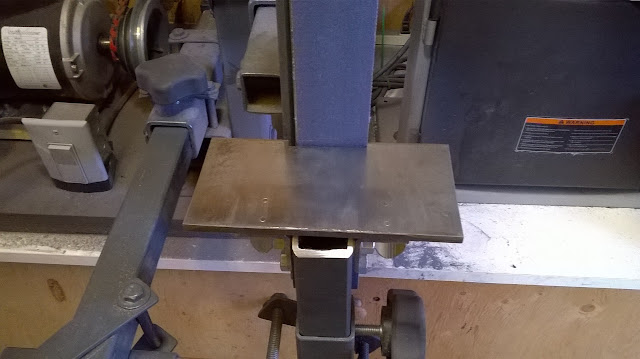
Here's the table mounted in the grinder.  I put it through its paces and found that it works pretty well.  I plan to change out the thumb screws for something different as I can't tighten it down enough by hand to keep the table from rotating.  The good thing is that I was able to get the table adjusted to exactly 90 degrees to the platen.

With my new table ready to go, I was anxious to start on a new knife.  I really liked how the last knife turned out, so I decided to make another of the Bobcat design.  This one will be made available for purchase instead of given away like the last one.  So, if you like it, keep up with my posts or send me an email and get on my email list for when the knife becomes available.  Here are some progress pics of this build.

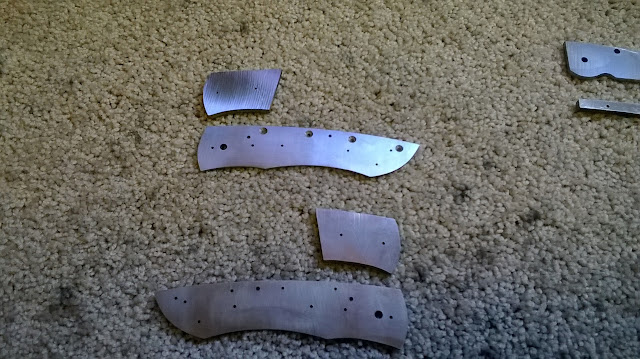
Above are the main parts rough profile ground.  The blade is CPM 154, the liners are 6AL4V titanium, the spacer is 416 stainless, the bolsters are Damasteel Damascus, and the scales are dyed and stabilized maple burl.  This should make for a very attractive combination.

Since I already have a titanium template for this knife design, I clamp it together with the liners in order to get all the holes aligned.  After I get all the holes drilled I will refine the liner profiles to their final shape.  By the way, I just got these new little clamps and they are awesome!

Here are the liners, spacer and blade all drilled, counter sunk, and tapped for screws.

The next step is to fit the bolsters and scales to the liners.  I use my awesome new clamps to hold the bolsters in place while I spot the holes.  Once the holes have been drilled, I put the bolsters together with small pins placed through the new holes and true up the back end that will be in contact with the scales and grind in a 30 degree dovetail on the back side.

Here are the front bolsters after the holes have been drilled and the dovetails ground in.  I have shown the process of building the handle before, so I won't go into detail with this build.

Here is where I finished up for the weekend.  The handle has been built and the pivot system has been started.  The blade is ready to go into heat treatment, something I hope to accomplish during the week.  I'm always surprised when working with Damascus as it pretty much looks like any other stainless steel until it gets a bath in acid.  Then the beautiful layers come into view.  I'm excited to see how it will look.

Thanks for following along with me on this new build.  It should be something extra special once completed.

-  Brandant Robinson

Monday, October 19, 2015

Let's Finish the Bobcat Knife

I was able to get the Bobcat knife project finished up over this last weekend.  I'm tickled pink over how this piece turned out.  Here's a quick look at the final steps.

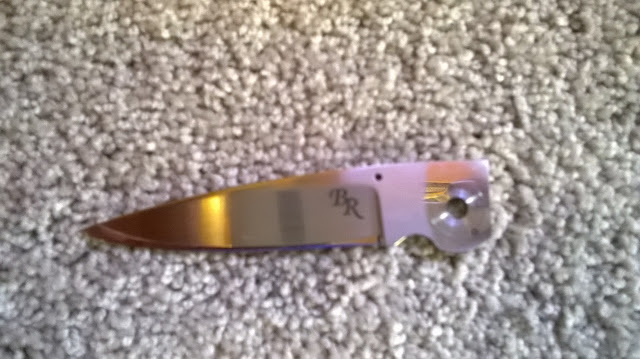
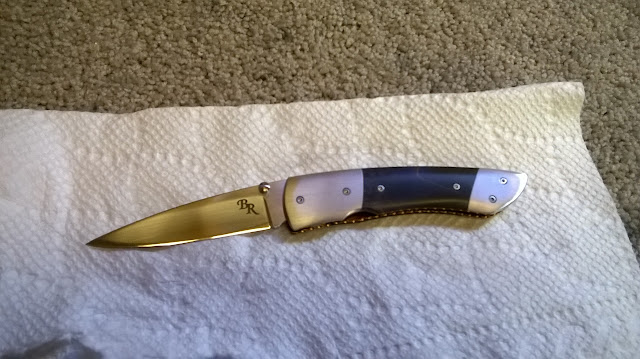
The knife was practically done at the time I left off last week.  Just a couple of things were left to finish up.  The above picture shows the blade in its completed state.  I put the final sharp edge on the blade and branded it with my maker's mark.

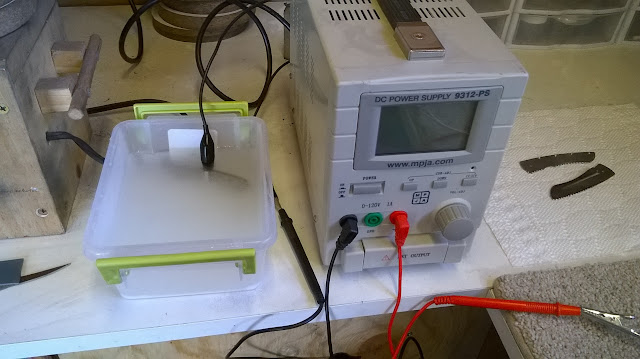
The next step is to anodize the liners to give the knife a little punch of color.  This photo shows my setup for anodizing.  It consists of a DC power supply, a couple of electrical leads with clips, a tub full of electrolyte solution (just water and Borax), and a sacrificial piece of steel suspended in the tub by the negative lead.  The positive lead gets clipped onto the liner, the power supply gets set to the right voltage, and the liner gets dunked in the tub for a few moments until the color is complete.  It's really a fascinating process.

Here is my little color chart for anodizing.  It's just a starting point as each setup effects the outcome.  I can't remember where I downloaded this chart, but a quick internet search will bring up tons of them.  I have written in a few voltages that work for my setup for the colors I use most.  It's pretty amazing the number of colors that can be achieved by the anodizing process.

For this project I chose a nice dark bronze color.  This color is on the verge of purple and in certain light and at certain angles, the purple color comes through.  I chose this color to compliment the blue scales.  I think it turned out real nice.

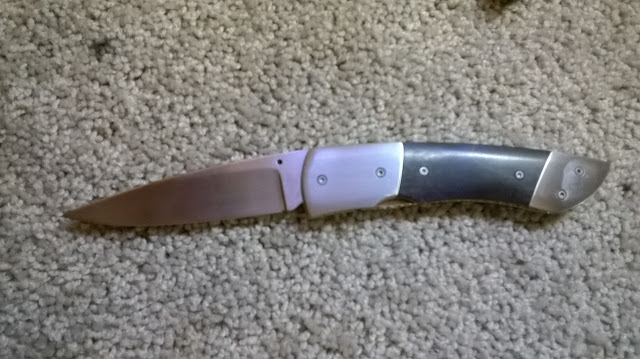
Here's the knife in its completed state.  You can see that I have turned and installed a little thumb stud which makes single hand operation possible.

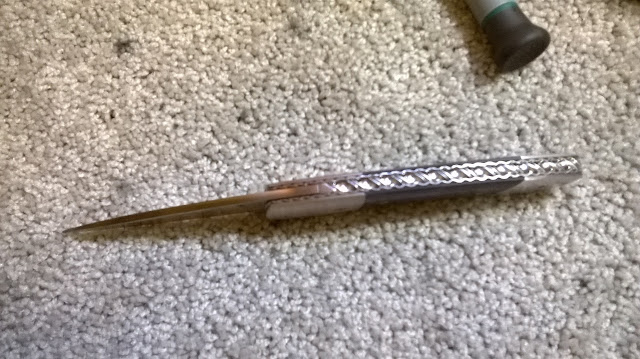
Here's a spine view of the finished knife.  Obviously my cell phone pics don't do this knife any justice at all.  I'll get my good camera set up and take some good pics in the next few days and post them for your viewing pleasure.

I'm very pleased with how this knife turned out.  The design is definitely a keeper and I think it showcases the extent of my skills at present.  I hope whomever gets this knife in the drawing appreciates it.  It's going to be hard to say goodbye to this one.  I hope you enjoyed following along with this build.  Thanks for stopping by the Robinson Edge.

-  Brandant Robinson
Monday, October 12, 2015

Almost There

This last weekend I was able to get quite a bit of detail work on the "Bobcat" knife, as well as the blade completed.  Here's a quick look this weeks progress.

Here is what the blade looks like after the initial grind is done with an 80 grit belt.  The masking tape is there to help establish the plunge lines at the transition to the ricasso.  Once I move past 120 grit, I will take off the masking tape and use my handy dandy edge guide to true things up perfectly.  I didn't get a pic of the edge guide, so if you want to see what I'm talking about you can to scan back through the previous post.  It's simply a couple parallel pieces of hardened steel that clamp onto the tang like a file guide.

In this photo, the blade is finished up through 120 grit.

Before I go any further, I need to grind the lock ramp on the back of the tang.  I do this on the disk grinder at an 8 degree angle.  The top 1/8" is not beveled so that it engages the spacer in the open position seamlessly.

The hollow grind is now finished up through 1500 grit, ending the work on the grinder.  That's as far as I will go on this blade since I plan to do a 600 grit hand-rubbed.  I like to go a couple stages passed the finished grit to make the hand finishing easier.

This photo is a little out of focus since my phone doesn't take very good close up pics.  Here are the liners and the spacer after several hours of file work.  Man, do my fingers hurt!  The liners get a serpentine pattern and the spacer gets a twisted ribbon pattern.  These two designs look great next to each other and I think they will compliment the overall look of this knife nicely.

This is where I finished off for the weekend.  The blade has been hand rubbed, the lock and detent system have been completed, and the left liner and bolster have been notched for the thumb stud and lock release.  This knife is really coming together nicely.  This crumby photo really doesn't do this knife justice.  Once it's completed, I'll take a few higher quality pics to show off the details.

Here's a photo of the spine of the knife.  Although the picture isn't the best, you can still get a feel of how nice the file work looks.  File work in my eyes is really what sets a handmade knife apart from a production knife.  It really ups the appeal of a custom knife.

Well, I think one more weekend and I'll have this knife completed.  I really like how this design looks and feels.  It's definitely going to be one of my favorite designs.  More to come next week.  Until then, thanks for stopping by the Robinson Edge.

-  Brandant Robinson
Saturday, October 3, 2015

Working the Pivot

I made a little progress on the Bobcat knife this weekend.  Most of my work on the knife was done on surface grinding the heat-treated blade, fitting the pivot, and setting the open and closed positions of the blade.  Here are a few progress photos of the work accomplished.

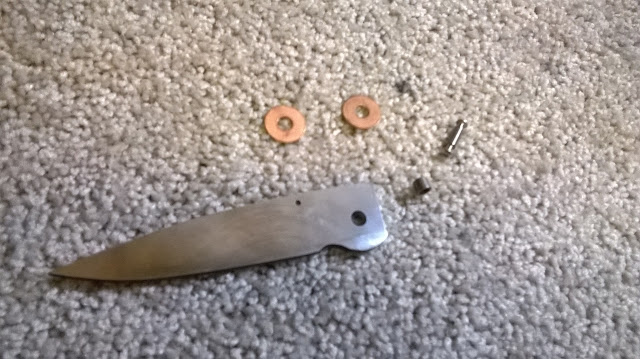
In this photo you can see all the parts that will make up the pivot; two bronze washers, a pivot pin with screws, and a pivot bushing.  The blade in the photo has been surface ground on my surface plate and is good and flat.  I have also reamed the pivot hole in the tang with a carbide reamer.  Waiting to ream the hole until after the blade has been heat treated has really helped to tighten up my pivots.

This photo shows the inside of the front bolster about to be drilled.  In order to conceal the pivot pin screw heads, a pocket needs to be drilled on the underside of the bolster.

Here are the two bolsters with the pivot screw pockets drilled in.

The spacer needs a little work before the blade will rotate properly.  At this point, the length needs to be trimmed back and the inside curve needs to be made wider so that the blade seats in a little deeper.  I have colored the tip of the spacer with black marker and scratched a mark where it needs to be ground down to.  After a little bit of grinding, the spacer will be ready to go.

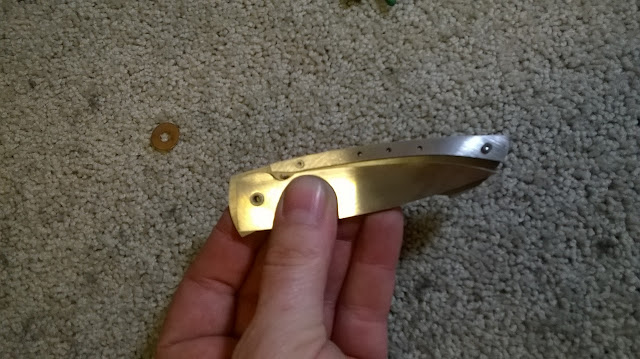
In this photo I am working to set the closed position of the blade.  I have added a stop pin and grind down the tang slowly with a 1/4" sanding drum in my Dremel until the blade folds in all of the way.  Just a little bit more to go and the blade will be seated perfectly.

The last thing accomplished was to begin the shaping of the handle.  To do this step, I use the slack belt attachment on my grinder.  Here is the knife assembled and the handle finished up to 120 grit.  I will take it up to at least a 600 grit finish, but I might decide to take it to a full mirror polish.  I decided to try shaping this handle a little differently than I usually do.  I think I'm going to like it.

Thanks for stopping by the Robinson Edge and for following along with me on my knife making adventures.

-  Brandant Robinson