Saturday, December 31, 2016

Kitchen Set Complete

Well, with all the extra shop time over the last two weeks because of time off of work for Christmas and New Years, I was able to get my sweet wife's kitchen knife set done.

If you recall from my last post, the chef's knife met an untimely demise, so I had to start over with this knife from scratch.  Here is a piece of 1/8" 440C with the knife pattern drawn on and the steel and rough cut.

After a few minutes at the grinder, the profile has taken shape.

I skipped a few photos, but there really wasn't much to see.  Here is the knife after coming out of heat treatment.  I guess losing the last knife left me a little gun shy.  I decided not to drill any weight reduction holes in the tang or to taper the tang until after heat treatment.

Here is the tang after it has been tapered.  I do this step freehand on the grinder with the flat platen.

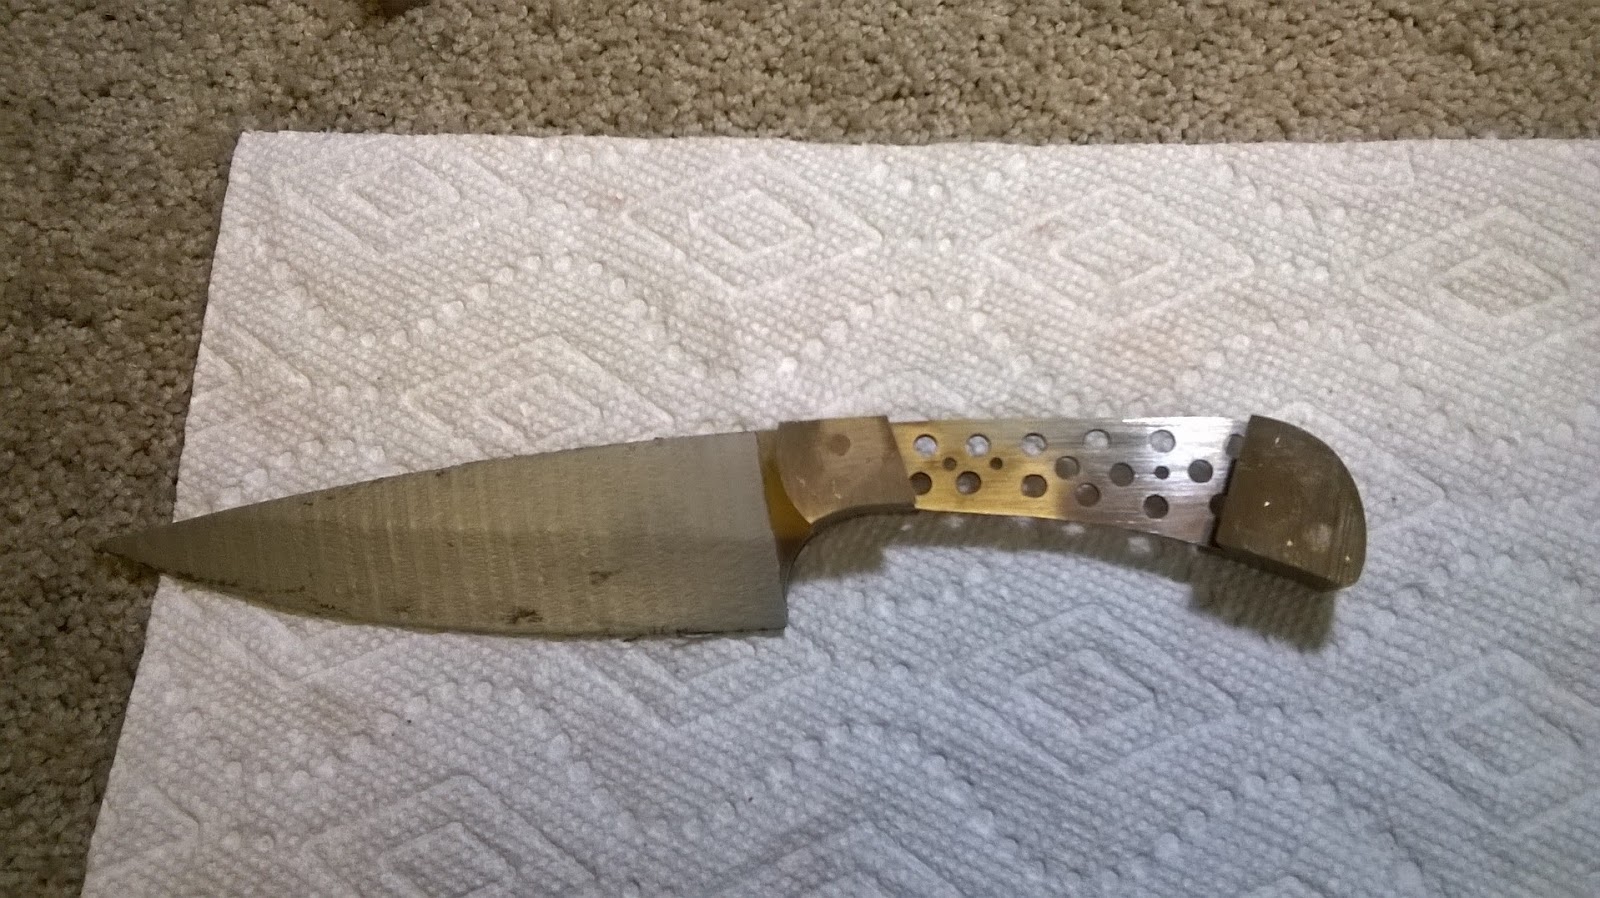
The initial hollow grind has been established.  I start my grinding at 50 grit and progress up through the ranks.

Here is my hand sanding setup.  My sanding jig is built to accommodate my small folder blades, so I have to use some c-clamps to hold the blade steady and the tip sticks out passed the jig.  Not a big deal, but I put a piece of tape on the tip to keep from becoming impaled on the tip of the knife.  On my sanding stick, after a few hours of work, the wood handles were digging into my hands, so I taped some padding onto them for comfort.  Kind of redneck I know, but it was a good temporary fix.

The front bolsters have been fit to the tang and the holes drilled through to match those in the tang.

Here the bolsters have been pinned together and the front faces have been sanded to 400 grit to match the finish on the blade.

After a trip to the anvil, the front bolsters have been peened in place.

Next, the scales need to be fit to the handle.  In order to see what I'm doing on the dark-color Micarta, I put a couple pieces of masking tape on the face and trace on the pattern.

The scales are fit and the back ends have been dovetailed and pinned temporarily in place.

Here the rear bolsters have been attached and the epoxy is warming up, getting ready to attach the scales to the handle permanently.

The chef's knife it its ugly state.  The bolsters are peened in place and the scales have been epoxied to the tang.

The handle has been shaped and finished up to 400 grit.  This handle shape is very comfortable, which is good since this knife should see a lot of use.  After this I marked the blade and put on edge on it.  There are a few pics of the finished knife and the whole set at the bottom of this post.

With the knives done, I needed to make some kind of a block to store them in.  I decided to use oak and poplar for some contrast.  Here are the boards rough cut to length.

The oak pieces get cut on a taper in order to give the fan effect that I'm looking for.

Here are the boards stacked in place to see how they will fit.  The block didn't give enough space to allow for the thickness of the knife handles, so I decided to add some walnut wedges from the board shown.

After cutting the walnut to size and shape, the pieces get dry stacked together to see how they will look.  Looks pretty good.

I stacked the boards together in a makeshift square and drew in a line for a curve on the face of the block where the knives will be inserted.

The boards have all been rough cut for the face curve.  Nothing has been glued in place yet, just dry stacked.

The thin poplar boards will be the pockets for the knife blades to slide into.  Here is one of them cut out to fit the profile of the blade.

Since I knew it would be a little tricky to clamp the block together without all the boards wanting to wander, I pinned each board to its neighbor as I glued them up.  Here's the stack as left to cure over night.

Out of the clamps and ready for some finish work.  I cleaned up the sides of the block with the thickness sander.  The face curve will be recut on the band saw and ground down on the 2x72 grinder until smooth.  I will also cut a curve in the back end to give it a little more character.  The bock will get a simple paste wax finish to protect the wood.

Success!!!  Here is the whole project all finished up.  The blades fit in nicely, they are separated enough to make removing and inserting them in the block effortless, and it all looks dang good as a whole.  Not to mention the colors and style of the block go really well with our kitchen decor.

Here's a group shot of the finished knives.  The first three have already see a lot of use in the kitchen over the past few weeks.  It's nice to have the set complete.

One final pic of the complete set.  I think it all turned out really nice.  This should be a nice, lifetime set of knives for my sweet wife and I to use in the kitchen.  This was a fun project, but I'm very glad to see it completed.  I'm ready to get back to making my folders.  Thanks for following along with me on this knife-making adventure.

-  Brandant Robinson

Monday, December 19, 2016

Utility Knife and an Epic Failure

The utility knife is now done, and it turned out great.  That's three down and one more to go.  Here's a look at the utility knife.

The building of the handle is underway.  The front bolsters have been pinned in place.

In this pic, the rear bolsters have been pinned in place.  I have also fit the scales to the handle and did some preliminary profile shaping of the bolsters.

The scales have been epoxied and pinned in place and are clamped up while the epoxy cures.

Here's the handle out of the clamps and ready for some cleanup and shaping.

And finally, the completed utility blade.  I took it into the house and my sweet wife put it through its paces in the kitchen.  Worked great!  It's really a comfortable design, especially for her small hands.

As the title of this post implies, I also experienced some trouble along the way.  Here's the bad news.

Here's a photo of the chef's knife after the initial hollow grind has been established.  The knife had a slight warp to it from heat treating, so I decided to try straightening the blade.  That's where the epic failure enters into the scene.

I tried straightening the blade cold instead of doing it the right way.  This is what happens when you try to cut corners.  Not a good thing.  Now I have to start from scratch with a new knife.  There's no way now that I'll have it finished for Christmas.  Oh well, you win some and you loose some.  Bad things are bound to happen in knife making, but it doesn't take the sting out of a catastrophe like this one.  But, I'll just pick myself up from the ashes of defeat, or shards as it were, and start over again. Luckily I had a leftover piece of 440C that fits the chef's knife pattern almost perfectly.  At least I don't have to wait for some new steel to be shipped.  Well, at least the utility knife works great.

Thanks for following along with me on this project. I had hoped to have this project done this week, but alas, that's just not going to happen.  I should get some shop time over the Christmas weekend, so I'll post up next week to show off any new progress.

-  Brandant Robinson

Wednesday, December 14, 2016

Edge Geometry

There has been a lot of confusion as of late on one of the knife making forums that I frequent in regards to knife edge geometry.  There has been a lot of discussion about primary and secondary bevel angles on blades and a general fogginess around what edge geometry is all about and what geometry is best for knife use.  I thought that it would make a great subject for a post here on the Robinson Edge.  So, without further ado, let's have a little discussion about knife edge geometry.

For the sake of argument, we will not get into how blade profiles effect how a knife performs; that will be reserved for a future discussion should it need to be addressed.  For this post, we will focus in on the cross sectional shape, or edge geometry, and how different grinds effect edge performance.  To level the playing field, we will look at blades that are 1/8" thick and 3/4" high, just for comparison purposes.  As far as the actual cutting edge, also referred to as secondary bevel, we will keep that a constant of 25 degrees across the board.  Most knife edge angles fall within 20 to 30 degrees of included angle, so 25 is a good middle-of-the-road angle.

Although there are many different candidates for knife geometry, we will only look at a few of the most popular.  Most other geometries are spin offs from these basic designs anyway.  Let's first look at some of the flat grind varieties.

Represented in the graphic above is the common Saber or Scandi grind.  The sides of the blades are left parallel and a single bevel is ground which comprises the edge.  As far as edge strength and edge retention, this is probably the best grind available.  There is a lot of "meat" behind that edge, making this choice very sturdy.  The actual width of the bevel is much longer than the rest of the geometries that we will examine.  The edge is in contact with the material being cut, causing friction or cutting resistance between the two objects.  Since the edge is fairly wide, the cutting resistance is relatively high, making this choice a poor candidate for a slicing knife.  It is, however, a great choice for a camp chopper or axe blade.

The next example of blade geometry is the full flat grind.  This cross section resembles a simple wedge where both sides of the blade are ground flat from the spine to the edge with a single bevel. This creates a very keen, low angle edge which makes for an extremely sharp blade.  Since the edge angle is very low, this produces an extreme slicing edge.  The downside of this geometry is the thinness of the edge leaves it prone to chipping and rolling, making the edge retention relatively low. For blades that are wider, or blades that are shorter in height, the 9 degree angle increases respectively, which strengthens the edge, lessening the edge problems, but there is still significant cutting resistance due to the very wide bevel.  This geometry is best reserved for wedge-type straight razors, or very specific use blades.

The third example is a combination of the previous two.  The blade is flat ground at a slightly lower angle, and a secondary bevel is ground at the very edge of the blade.  This type of grind increases the strength of the edge significantly over the full flat grind, but it does gives up a little on the keenness of the full flat ground edge.  With the short secondary bevel, cutting resistance is greatly reduced, and, even though the edge angle is increased, it is still a great slicing geometry.  This geometry is very common in kitchen and hunting knives.  I've also seen this geometry in many folders.  It's a great all-around geometry.

The full hollow grind is very recognizable in straight razors.  You won't find a finer edge on any other geometry.  You also won't find a more fragile edge out there either.  The edge is extremely thin and weak, but the slicing ability of this geometry is second to none.  Although the weakness of the edge makes this a poor candidate to general knives, straight razors just wouldn't be the same without it.

The final geometry that I wanted to explore is the hollow grind with a secondary bevel.  This is my grind of choice for almost all of the knives that I make.  The secondary bevel strengthens the edge significantly and the short width of the edge gives little cutting resistance, making for a great slicing blade.  Another benefit that the primary hollow grind offers is that as the knife is sharpened repeatedly over its life, the secondary edge width stays fairly short due to the "undercutting" of the hollow, which keeps it slicing and performing well for a very long time, more than the flat grind with secondary bevel.  The hollow grind is a little more difficult to achieve than a flat grind, which is likely why many makers choose go with the flat grind geometry.  I believe the benefits make it worth the effort to hollow grind a blade, not to mention it looks really cool too.

While this list is certainly not exclusive, I think it will give you a much better understanding of the importance of edge geometry.  Each of the various geometries has it's place in the blade world where it is the best choice for a specific application.  It is up to the knife maker to choose the best geometry for a knife's intended use.

-  Brandant Robinson

Monday, December 12, 2016

Boning Knife Done, On to the Utility

I made some good progress on the chef set over the past weekend.  I was able to get the boning knife completed and made some headway on the utility knife.  Here are a few pics of the progress on the set.

Here's the boning knife out of the clamps in all its "ugly" glory.  Right now it looks like something a preschooler might have put together.  Not to worry though.  After a few minutes at the grinder, things will clean up nicely.

Here's the handle after some time at the grinder.  Looks a lot better, doesn't it?  I love how dovetailing the bolsters and scales looks after contouring the handle.  It gives the illusion that the bolster/scale junctions are curved.  The handle turned out really comfortable.

Here's the finished knife completed.  I had a little fun carving up an index card that I had lying on the bench.  The knife is very sharp and should make for a great kitchen accessory.  I took it into my sweet wife and she was very pleased with it.  She used it to cut up some chicken for grilling and loved the way it felt and how great it cut.  I'm glad she likes it.  On to the next!

Here's the utility knife after the initial hollow grind has been ground in at 50 grit.

After a quick check on the cutting edge, it looks like we're at about 25 thousands.  This will get thinner as I progress through the abrasive grits, but for now, that will do.  In the end, I'll take this one up to 400 grit like I did with the other two.

The blade has been ground and satin finished out to 400 grit at this point.  I taped off the blade with the handyman's secret weapon, duct tape, to protect the finish while I work on the handle.  I have the first front bolsters clamped onto the tang, ready for drilling the pin holes.  This is where I had to knock off for the weekend.  I hope to get this knife completed this next weekend.  I don't think I'll have the chef's knife done in time for Christmas, so this project may turn into a Valentine's gift.  Oh well, I've already given the first two knives to my sweetheart anyway, so it doesn't really matter when they are all finished.  I just hope they get some good use in the kitchen.  Thanks for following along with me on this project.

-  Brandant Robinson

Monday, December 5, 2016

Boning Knife Almost Complete

I hope everyone enjoyed their Thanksgiving as much as I did.  We had a wonderful time together as a family and the turkey was cooked to perfection.  I didn't get any shop time last week due to the festivities, but this weekend I made some pretty good headway on the boning knife.  Here's a look at that progress.

After many hours of grinding and hand sanding, the boning knife has been ground and satin finish. It's about ready for its handle.

Here's a quick look at my new hand sanding tool.  Up until now I have used a single handle tool that was working really well, but it was putting a lot of strain on my wrists and fingers, so I came up with this double handle version.  I have attached a rubber rectangle to both sides that acts as a backing for the sandpaper, helping it get right into the hollow grinds of my blades. This baby has reduced my hand finishing time by over half, and without the finger and wrist strain.  I don't know why I didn't make this a long time ago.

I got into the zone and forgot to take pics of the build until this point.  The bolsters have been peened to the tang and the scales have been attached with pins and epoxy.  Here's the knife all clamped up, awaiting the epoxy to cure.  I'll get the handle shaping and the knife completed in the near future. Thanks for following along with me on this project.

-  Brandant Robinson