Monday, July 25, 2016

Building the Knife Block

Now that all four of the knives have been completed for my daughter's kitchen knife set, it's time to finish off the project with a little bit of woodworking.  Before I caught the knife-making bug, I dabbled in woodworking for a time.  Nothing too fancy, mind you, but I did enjoy the process of creating simple pieces out of wood.  It was nice to blow the dust off some of my old tools and work with wood again. Below are some photos I took of the process of putting the knife block together for the kitchen set.

The supply of hardwood is very limited here in my hometown.  Unless I go through the process of ordering wood from online sources, not being able to self select the materials and paying a fortune in shipping costs, I'm stuck with whatever the local lumberyards have in stock.  In this case my selection was between oak and plain old poplar.  Not much of a choice really, so oak it was.  Oak is not my favorite wood choice, but I think it will actually look good next to the box elder handle scales of the knives.  All of the available stock was also limited to 1" thick, which in reality is only 3/4" thick.  So, being impatient and ready to put this project to rest, I purchased some 1" x 12" stock and commenced the process of gluing up a laminated block.  Here's the stack of wood with my paper pattern on top. The rectangles on the pattern show where the blade holes will be located in the center of the block.

One of the benefits of laminating this block together is that I can cut out the blade holes before I glue up the block.  To get started on this, I need to plane down the thickness of the center layer to about 3/16", which will be slightly wider than the knife blades, but not too over sized to where the blades will be sloppy in the hole.  The old trusty thickness planer accomplishes this task.

Here's the board after being planed to thickness.

Next, I cut each of the five boards to shape on the table saw.  I could do this once everything is assembled if I had better equipment, but my table saw won't cut through the full thickness of the assembled piece.  So, each layer gets cut to shape separately before glue up.

With some trusty Elmer's rubber cement, the kind that you used back in grade school, I fix the pattern to the thin center layer.

With the pattern fixed to the wood, it's off to the band saw to cut out the blade recesses.  Here's the piece after the blade holes have been cut out.

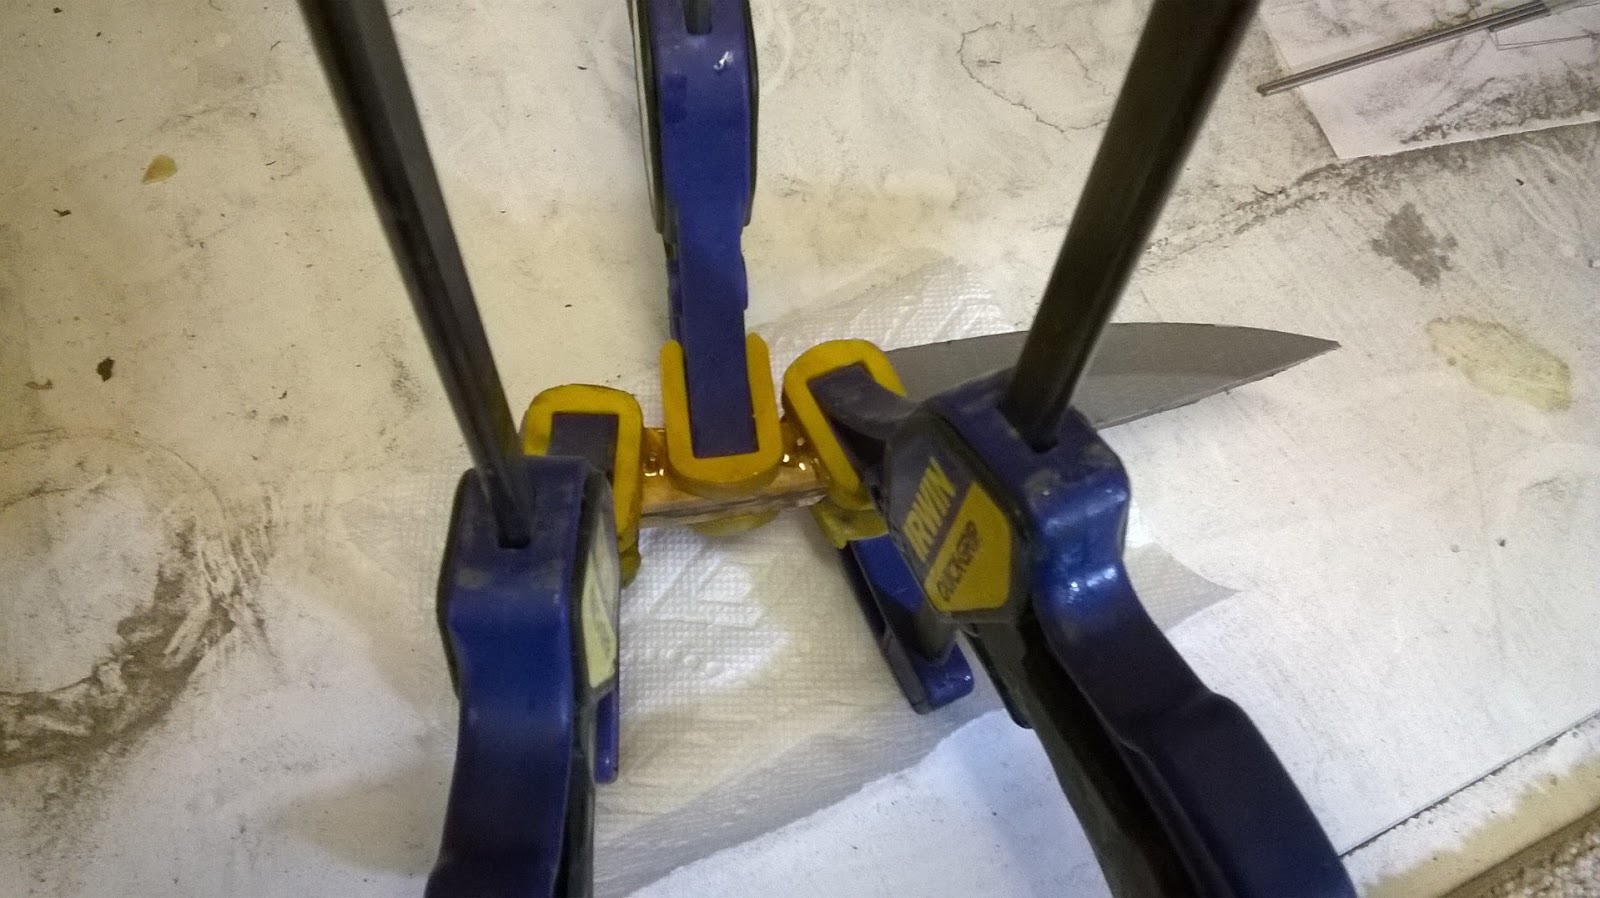
With a little finessing and a lot of clamps, the five layers get glued up with some water resistant wood glue and allowed to dry.

Here's the block after the glue is dry and the clamps have been removed.  The edges are a little uneven, but we'll take care of that in the next step.

Using my jointer, I shave off the edges of the box until the surfaces are smooth and square to the sides of the block.

Here's the test fit with the knives in the block.  Amazingly enough, they actually fit!  Looks pretty good too.

To pretty things up a bit, I decided to chamfer the sharp edges around the block.  This is done with a chamfering bit at my router table.

Here's the block after the detail work is complete.  It's ready for some finish sanding.

Here's my trusty pad sander that was used to smooth things up.  I've logged many hours on this old thing and it just keeps on running.  Not bad for a cheap tool.

Here's the final piece after a hand-rubbed oil varnish has been applied.  Once the finish is dry, I'll apply a coat of wax and give it a buff to bring up the shine.  This project is so close to the end that I can almost taste it.  Once everything is finished, I'll brake out the good camera and take some better pics of this project and post them up for your viewing pleasure.

I brought the set into the house for my daughter to inspect.  I caught her in the kitchen slicing up some strawberries and, try as I may, I couldn't get her to try out her new knives.  So, I pulled out the paring knife from the block and started helping her cut up the berries. Someone had to take them out for a test drive!  Sharp, smooth, and comfortable.  They passed my own inspection with flying colors. Now, I'm pretty sure that my sweet wife is going to want her own set.  Hopefully I can squeeze in a few folders before that happens, as I'm hankering in the worst way to start on a new folding knife.  I had a great time with this project and produced what will hopefully be a family heirloom. Thanks for following along with me on this project and sharing in my knife-making adventures.

-  Brandant Robinson

Monday, July 18, 2016

Fourth and Final Knife Complete

Wow, what a roller coaster of a week.  I had great things happen, tragic things happen, and a bunch of things in between.  You probably have times like that in your lives too.  I suppose that is what life is all about; having experiences, learning from them, and becoming a better person because of them.

The fourth and final knife of my daughter's kitchen set is now complete.  Since it was built just like the other three, I didn't bother taking too many photos of the progress, but here are the few that I did take.

These chunks of steel shown above are the four bolsters for the chef's knife.  They have each been blocked out and the back sides have been ground flat on the disk grinder.

Here's the knife with the front bolsters attached.  The pins blended in very nicely.

The scales have been fitted to the handle, dovetailed, and the black liners have been attached.  I really like the looks of this box elder burl and I enjoyed working with it.  I'm going to have to use this stuff more often.

In this photo the rear bolsters have been attached and the scales have been temporarily pinned in place for a final fitting before epoxy is applied.  The fit is nice and tight. 

Here's a photo of the completed knife.  It's a smaller sized chef's knife, about 10.5 inches total length with a 7 inch blade.  That's about the maximum length that I can fit into my heat treat oven, so I am limited by my equipment.  I think it turned our really nice.  It feels great in the hand, is well balanced, and looks absolutely gorgeous.  I have no doubt that my daughter will enjoy using it.  I'll take some better photos of the set in the near future and post them up here on the Robinson Edge Blog.

Now, with the four knives complete, I just have to come up with a design for a block or stand to keep them in and at the ready on the kitchen counter.  I plan to make some kind of a stand out of wood that will compliment the handles and not detract from their beauty.  It will be fun to get back to my woodworking roots.  Wish me luck.

-  Brandant Robinson

Monday, July 11, 2016

Utility Knife Complete

Three down, one more to go.  I was able to complete the utility knife for my daughter's kitchen set over this last weekend.  I think it turned out just as nice as the others, in spite of a few hiccups along the way.  Here are a few photos of this weekend's work in the shop.

If you recall, we left off last week with the utility knife clamped up, waiting for the epoxy to cure. The next step was to finish up the handle.  Most all the shaping work took place on my grinder with either the flat platen or the slack belt attachment.  I progressed up through the grits until the handle was nice and shiny.  I finished up by hand to get into those hard-to-reach places and gave the bolsters a 600 grit hand-rubbed finish.

The blade gets my maker's mark etched in with my shop-built etching machine.

Here is the completed utility knife after the edge has been sharpened.  It matches up with the other two knives of the set really nicely.  Again, I'll take some better photos once the set is complete.  Won't be too much longer I hope.

On to the last knife of the set, the chef's knife.  Here's the knife bolted to my hand sanding jig, awaiting its satin finish.

After a whole lot of hand sanding, one side of the blade is finished.  I got the other side really close to completion too before I left the shop.  I hope to get this knife finished up soon.  As much fun as I've been having with this project, I'm ready to move back to my folders.  I sure hope my daughter appreciates the time and effort that has gone into making these knives for her.  Thanks for following along with me on this build.

-  Brandant Robinson


Tuesday, July 5, 2016

The Chef Set Saga Continues

I hope everyone enjoyed their Independence day weekend as much as I did mine.  It was nice to gather around with family, get a few honey-do projects taken care of, and to take time to reflect on the freedoms and liberties that we enjoy here in the United States of America.

In between the celebrations and the projects, I managed to make a little progress on the utility knife of my daughter's kitchen knife set.  Here are a few pics showing last weekend's accomplishments.

I spent some time completing the hand-rubbed finish on the blade of this knife and covered it with the handyman's secret weapon to protect the finish from scratches.  The bolsters have been blocked out from a bar of 1/4 inch thick 416 stainless and the inside surfaces have been ground flat on the disk sander.

Here are the six pins for the knife made from 3/16 inch 416 stainless pin stock, cut to length and ready to be put to use.

The front bolsters have been drilled and glued together so that the front ends can be ground to match. Here they are still glued together with a 600 grit finish on the faces.  I use a small drop of super glue to hold them together while matching.  A simple tap on a hard surface is enough to break the glue joint when the time comes to separate them.

The back ends of the bolsters get a 30 degree dovetail ground in.

After some work at the anvil, the front bolsters have been attached.  No visible pins after a quick spin on the grinder means that the process was done right.

Time to work on the scales.  Here they are with the front edges fit to the front bolsters and the black liners glued in place.

This picture shows the scales pinned temporarily in place.  The front pin is way to far forward for my liking, but it's the price to pay after making the big mistake with the scales on the last knife.  If you recall, I had to scrap a set of scales, which meant I only had just enough matching box elder burl for one more set so that all four knives would match.  So, on this knife, I had to extend the back of the front bolster in order for there to be enough scale material for this knife.  Since the holes were already drilled through the hardened tang, I was stuck with the pin location.  It just goes to show that one mistake can ripple out in a large project.  Oh well, I can live with it.  Live and learn I guess.

Here the rear bolsters have been installed and peened in place.  You can see the heads of the pins here which will get ground off flush.

With the handle assembled, I ground the parts down to the correct profile.  Even with that front scale pin a little forward, this should still be an attractive piece.

Here's a spine view to show off the tapered tang and the look of the dovetailed bolsters and black liners.  Pretty snazzy!

The last thing accomplished was to glue the scales in place.  Epoxy is always a messy ordeal, but it's a necessary evil to keep things fixed.  I should be able to get this knife finished up next week and be on to the last piece of the set.  Thanks for following along with me on this build.

-  Brandant Robinson