In this post, I finish up the second "Virtue" knife, which is actually my knife #24. This knife is from the exact same pattern as the last "Virtue" knife, but you will quickly see how much different this knife looks when compared to the last. This illustrates how simply modifying the bolsters/scales and handle material, one can completely change the aesthetics of a knife.
For this knife, the liners and the scales get a treatment called jeweling. I have shown this process in previous posts, but the above photo illustrates the procedure. The liner/scale gets covered in an abrasive paste, which is actually valve grinding compound that I purchased from an auto parts store. I then chuck a felt polishing fob in my drill press and flip on the switch. I lower the drill press until the fob makes contact with the metal and, while applying a small amount of pressure, let the drill spin for about 30 seconds to get the circular pattern scratched into the surface. I then move the piece over slightly and repeat the process. Each circle overlaps the previous, achieving the classic jeweled pattern.
Above are pictured the liners and scales after they have been jeweled. I think it makes a nice, striking pattern which gives the flat surfaces a three dimensional look as it reflects light at different angles.
Here are the liners and one of the scales after they have been anodized. The colors really bring out the jeweled surfaces. If you look closely at the scale, you can see a few lines that will be the boundaries of the texture that will be added.
The scales will get some texture on them to help break up the large, uniform surfaces. I tried several methods for doing the texturing and finally settled on using a diamond wheel to accomplish the task. It seemed to give the best effect in this application.
Here is the liner with one section textured. The reason for anodizing before texturing is to achieve a two-toned effect by anodizing the textured surface a different color.
Here is the scale after the texturing is complete. Not much of the jeweling is left after the texture is added, but what is left will give a more dramatic affect than leaving the high spots polished.
Here are the scales after being anodized. I chose to use a bronze color for the low spots which compliments the purple color really well. When you are anodizing with multiple colors, you start with the higher voltage color and work down from there. I think this looks pretty awesome, if I do say so myself.
I have assembled the knife to have a look at the over all aesthetics of the knife. I think it looks pretty good, except that I don't like the way the blue liner looks with the scales. Too much contrast. You will see later on that I went ahead and modified this color.
Here is a view of the knife's spine.
It's time to focus on making the thumb stud for this knife. I chuck a piece of 416 stainless steel dowel rod in my Jacob's chuck on my lathe. I missed taking a few photos, but in the photo above I have already drilled and tapped the steel to accept a 0-80 screw which will hold the thumb stud to the blade. I have also blacked the steel with a black marker and marked the overall length of the piece.
Using a small, three-corner file, I cut into the steel to show the actual length of the stud.
These close up pics are kind of blurry. I couldn't get my phone camera to focus very well at this distance. Anyway, I have used a hack saw to cut away the dowel at the appropriate length, leaving a small amount of steel holding things together until the stud is shaped. The dowel's diameter is slightly larger than I want for this knife, so I decrease the diameter with a flat file.
This one is really blurry. Curses! If you look very closely and maybe cross your eyes, you can see that I have started shaping the stud with a round file.
In this pic, I have finished shaping the thumb stud, parted it off of the dowel, installed a screw into the threads and mounted it onto the lathe to clean up the top of the stud. Next, I keep it on the lathe and polish up the part and buff it all nice and shiny.
Here is the knife with the thumb stud attached. Looks pretty snazzy, don't you think? Confession time. After installing the thumb stud, I found that the knife would not close properly. The stud hit into the liner before it was completely closed. This necessitated enlarging the thumb notch slightly, which messed up the whole color scheme since I did not want to retexture the whole knife. I decided to anodize the whole scales bronze and change the liner colors to purple. The colors are not as striking as they were at first, but I'm still pleased with the whole package. I also changed out the pivot screws for titanium screws which I anodized purple to compliment the liners.
Here is a shot of the spine of the knife. All finished! The only thing left to do is to add a lanyard and take some better-quality photos before I post this and the other "Virtue" knife for sale. I'll get that done in the next day or two and send out an email to all subscribers.
Thanks a bunch for following along with this build. I really enjoyed this one. For the next build, I will go back to building a single knife at a time. Two at a time just takes too long and I get impatient. Now, which one of my many patterns shall I build next? Time will soon tell.
- Brandant Robinson
Monday, July 20, 2015
Tuesday, July 14, 2015
Grinding the Blade
This last weekend, I was able to make some good progress on the second "Virtue" knife. Most of the work accomplished was grinding and finishing the blade. I'm really starting to get the hang of using my new grinder and I'm very pleased with the grinds I have been able to achieve. Grinding goes a little faster and looks a little better each time I grind a blade. I guess that can be chalked up to experience. Here are a few progress photos of the weekend's work.
In the above photo, I have ground the blade up through 120 grit and established the plunge lines and the top of my grind. From here on out, I use the time-honored Sharpey technique to keep a close eye on the grind progress. It's an extremely complicated technique - I'm being sarcastic here - where one scribbles on the blade with black ink and grinds it off again. The light in the above pic is reflecting off the blade grind, but it has been painted with black Sharpey ink.
Here is what the blade looks like after a single pass at 220 grit. You can see that there is some black ink left on the blade. This shows me that the entire surface of the grind is not in contact with the grinding belt. As the belt grits go up, and the abrasive particles go down in size, the circumference of the grinding surface actually decreases, accounting for what you see above. This is solved simply by grinding a few more passes until the black ink is gone and the scratches from the previous grits are sanded away.
Here is the blade after it has been mirror polished up through 3000 grit, followed by a cork belt charged with pink scratchless compound. Next, I polish the spine and tang edges up to a mirror polish too so that they are bright and shiny. I know it's a little overkill to take a blade that will receive a hand-rubbed satin finish up to a mirror polish, but I really hate to sand by hand and I can go from here, directly to a few strokes by hand to get that soft, satin look.
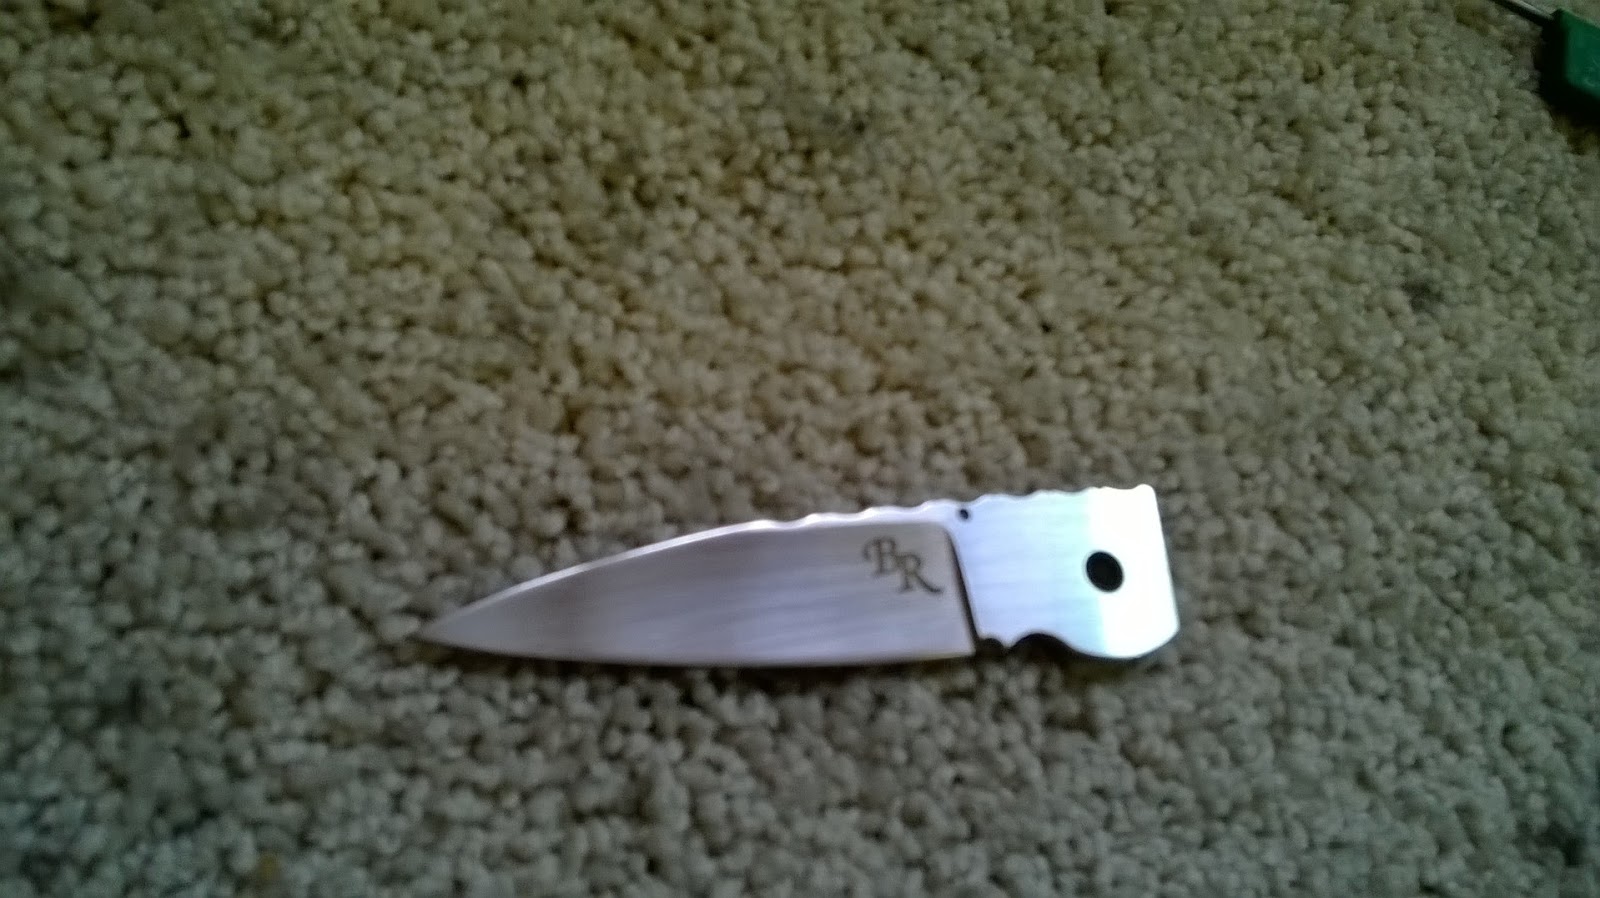
Here is the completed blade with a 600 grit hand finish and my maker's mark etched into the side. I really took my time on this blade and was able to achieve a great finish. I can't wait to see what this knife will look like when I get it completed.
In the above photo, I have ground the blade up through 120 grit and established the plunge lines and the top of my grind. From here on out, I use the time-honored Sharpey technique to keep a close eye on the grind progress. It's an extremely complicated technique - I'm being sarcastic here - where one scribbles on the blade with black ink and grinds it off again. The light in the above pic is reflecting off the blade grind, but it has been painted with black Sharpey ink.
Here is what the blade looks like after a single pass at 220 grit. You can see that there is some black ink left on the blade. This shows me that the entire surface of the grind is not in contact with the grinding belt. As the belt grits go up, and the abrasive particles go down in size, the circumference of the grinding surface actually decreases, accounting for what you see above. This is solved simply by grinding a few more passes until the black ink is gone and the scratches from the previous grits are sanded away.
Here is the blade after it has been mirror polished up through 3000 grit, followed by a cork belt charged with pink scratchless compound. Next, I polish the spine and tang edges up to a mirror polish too so that they are bright and shiny. I know it's a little overkill to take a blade that will receive a hand-rubbed satin finish up to a mirror polish, but I really hate to sand by hand and I can go from here, directly to a few strokes by hand to get that soft, satin look.
Here is the completed blade with a 600 grit hand finish and my maker's mark etched into the side. I really took my time on this blade and was able to achieve a great finish. I can't wait to see what this knife will look like when I get it completed.
This is the last photo I took of the weekend progress made on this knife. Honestly, I got caught up in the process, zoned out of everything else in life, and completely forgot to take more pics. I seem to do that a lot, don't I? Anyway, the above pic shows one of the liners getting it's embellishments through hand filing. The pattern that I chose for the liners on this knife is as simple as they come. I use a small round file and make semi-circular cuts every 1/8", giving a scolloped look to the inside edge of the liner. I wanted to keep it simple since the spacer is fairly ornate in design. I think they will compliment each other quite well.
What you don't see above, what I missed taking pictures of, was the processes of cutting and fitting the lock, and setting the closed and detent ball positions. I have shown these processes before in previous posts, so if you are curious as to how I accomplish these tasks, just scroll back through earlier posts and you'll find the information you're looking for.
The next step will be to finish off the scales for this knife. If you recall, this knife gets fitted with titanium scales. My plan is to add some artful texturing to the surface and maybe play a little bit with colors through anodizing. I'll be sure to do a better job of documenting that process.
I hope you are enjoying following along with me on this build. I'm sure having a great time with it. It won't be long now before the knife will be finished. As soon as I do, I'll get some good photos taken of it and the other "Virtue" knife and post them to my "Available Knives" page on the blog for some lucky person to add to his/her collection. Thanks for stopping by the Robinson Edge.
- Brandant Robinson
Tuesday, July 7, 2015
File and Sandpaper Racks
With all of the fun and frivolity with family over the 4th of July weekend, I didn't get any knife work done out in the shop and, honestly, I don't regret it for a second. It was a joy watching the little ones scurry about, picking up the candy from the hot asphalt during the parade and the smell of BBQ in the afternoon. It was a fun weekend. I hope you enjoyed yours as much as I did mine.
I did slip out to the shop for a few minutes between activities and did a little organizing. Here is what I accomplished.
I hung some bins on the wall to hold all of the different grits of sandpaper that I use regularly for my knife-making chores. Before now I have had all my sandpaper all jumbled up in the same drawer. I had to sort through a big pile grits and sizes in order to find the right paper I needed to do some sanding. Now, all I have to do is go to the right bin and grab a piece without having to sort through the mess. I think I'm going to like this. I also picked up a couple "project boxes" to keep my builds separate and organized as well as a place to store knife patterns. They are the two little, clear boxes below the sandpaper bins.
The other thing I managed to do was to get my files organized. I've had these files rolling around in a single bin, banging into each other. It's nice to have them all out and visible now. It's a simple block of 2x2 scrap wood that I had laying under my workbench for some time. I drilled a series of holes in the block to hold the files upright where I can see what I need. I have regular needle files on the left, diamond files in the center, and larger files to the right. I also put the files that I use most toward the front and those that don't see much use are in the back. I think this will work pretty well to keep my tools organized and accessible without the frustration of sorting through the bin to find the right file.
I hope someone finds this information useful. Thanks for stopping by the Robinson Edge.
- Brandant Robinson
I did slip out to the shop for a few minutes between activities and did a little organizing. Here is what I accomplished.
I hung some bins on the wall to hold all of the different grits of sandpaper that I use regularly for my knife-making chores. Before now I have had all my sandpaper all jumbled up in the same drawer. I had to sort through a big pile grits and sizes in order to find the right paper I needed to do some sanding. Now, all I have to do is go to the right bin and grab a piece without having to sort through the mess. I think I'm going to like this. I also picked up a couple "project boxes" to keep my builds separate and organized as well as a place to store knife patterns. They are the two little, clear boxes below the sandpaper bins.
The other thing I managed to do was to get my files organized. I've had these files rolling around in a single bin, banging into each other. It's nice to have them all out and visible now. It's a simple block of 2x2 scrap wood that I had laying under my workbench for some time. I drilled a series of holes in the block to hold the files upright where I can see what I need. I have regular needle files on the left, diamond files in the center, and larger files to the right. I also put the files that I use most toward the front and those that don't see much use are in the back. I think this will work pretty well to keep my tools organized and accessible without the frustration of sorting through the bin to find the right file.
I hope someone finds this information useful. Thanks for stopping by the Robinson Edge.
- Brandant Robinson
Tuesday, June 30, 2015
One Down, One To Go
I made some good progress on the first of the two "Virtue" knives. In fact, it's practically finished, lacking only a good sharpening. I decided to focus on the one knife, taking it through to completion before I bring the second knife along. I had a craving to hold a finished knife in my hand, and finishing them one at a time helps me get to the finish line sooner. Here's a look at what I was able to accomplish over the weekend.
A satin finish is a fairly simple process, but requires a lot of work. I chose to put a 1500 grit finish on this knife, so I sanded successively up through the grits and finished up with 1500 grit paper. The big trick to a good finish is a nice, consistent scratch line over the whole bolster. The reason for leaving the bolsters attached to the liners is to be able to keep the small pieces supported while they get finished. A simple clamp holds the piece securely to the workbench. It can be a little difficult on the curved surfaces to keep the lines straight, but with a little patience and persistence, it's quite doable. To back the sandpaper, I use a rubber pad that I cut out of a sanding block designed for use on drywall finishing. It has enough flex to it to help get around those curves, and yet is firm enough to work the flat areas.
This picture is a little fuzzy, but I think you can still see the difference between the bottom and the top halves of the handle. I really like the softness that a good satin finish creates. It's certainly worth the extra effort and it doesn't show scratches and wear like a mirror finish will.
Next, it was on to the spacer. Polishing up file work can be a little tricky, depending on the actual pattern used. This particular pattern is what I call "twisted ribbon". Some may call it a rope pattern, but I think it looks more like a ribbon wrapped around a cylinder. Using sandpaper wrapped around a file, I get into the grooves of the file work pattern to bring up the polish. It then gets a turn on the buffing wheel to really bring out the brilliant shine. In fact, it's so shiny that it blurred the picture. Bummer! I guess you'll have to take my word for it that it looks great. I'll get some much better photos of this knife real soon so you can see all the details clearly. I take progress photos with my phone as I don't want to damage my good camera.
With the bolsters and spacer finished, it's time to tackle the liners. On the last build, I showed my process of jeweling the inside of the liners of the "Guardian" knife, so I won't repeat it here. Here's a link if you missed it Jeweling Liners. It's a subtle detail since you have to look inside the knife with just the right light in order to even see it, but I think it's worth the effort. But, it is quite visible at the thumb release part of the lock bar.
With the liners polished and jeweled, it's time to give them some color. Titanium is truly a wonder of nature. By passing electrical current through a bath of electrolyte, titanium builds up layers of titanium oxide. By varying the voltage, the thickness of the oxide layer is controlled, producing different colors. Mr. Titanium explains this very well on his website at Mr. Titanium if you are interested in the science of the process.
My setup is fairly basic. At the right of the above photo you can see my DC power supply. The negative lead attaches to a sacrificial piece of steel suspended in the electrolyte bath. This particular piece of steel happens to be a messed up liner from the very first folding knife that I ever made. A piece of stainless steel would be better, but this hunk of O1 works just fine and holds some sentimental value. It's as though that first knife is imparting something of itself to all of its progenitors. Kind of cheesy, I know, but hey, I'm sentimental.
The positive lead gets attached to the liner that will be anodized. The bath is filled with electrolyte which is simply water and Borax laundry detergent mixed together to full saturation. In the upper left corner of the photo, you can catch a glimpse of a little color chart with listed voltages for the different possible colors. I have three or four go-to colors that I really like, but it's good to have possibilities to choose from. If you do your own anodizing, don't trust any chart explicitly. Each set up has different variables that effect the true voltage needed to achieve a desired result. Run a trial run with your set up and record the voltages that work for your process before you ruin all the hard work that you put into making your liners.
After a few seconds at 13 volts, this is what we get. I chose a nice bronze color that will go well with the red spacer behind the scales as well as compliment nicely with the colors of the mammoth. I feel it's very important to carefully choose your colors, textures and finishes that are used in a knife. I want the end product to be as aesthetically pleasing as it can possibly be. Like Hannibal used to say on the old TV show the A-Team, "I love it when a plan comes together." This is by far my favorite anodizing color.
Next up, the blade gets its 1500 grit, hand-rubbed, satin finish. The photo doesn't show it, but the spine and tang get a mirror polish for some added contrast and drama. That's a great looking blade if I do say so myself.
I fired up my new, shop-made electrochemical etcher and etched my mark into the blade. Man, I like that look! I've had many people ask me why I don't mark my blades. Now I can tell them I do. Maybe it will improve my name recognition along the way too. Classy!
Pictured here is the completed knife. I know you hear it all the time, but let me tell you, the picture really doesn't do this knife justice, and it looks pretty darn good in the photo! I missed taking photos of the fabrication of the thumb stud, so I'll be sure to include that in the next knife too. I have to say, that this is by far my best knife to date. The fit and finish is really nice and the knife opens and closes effortlessly. As I stated at the beginning of this post, I still need to put an edge on the blade. Once I do, I'll take some good photos with a better camera to show off the knife in its best light.
This has been a really fun build and I continue to learn with each knife I make. The great thing is that I have another knife sitting on my workbench that is just waiting for the detail work, which is the funnest part of knife building. I'll get back on that one if I have some time over the 4th of July holiday weekend coming up.
I appreciate you following along with me on my knife making adventures and hope you are enjoying your visit. Thanks for stopping by the Robinson Edge.
- Brandant Robinson
The handle is all fitted and ready for a final satin finish. I got everything polished up nice and shiny on the grinder and a little bit of hand work. I wanted to put a satin finish on this knife, so I left the bolsters attached to the liners and removed the mammoth scales.

With the bolsters and spacer finished, it's time to tackle the liners. On the last build, I showed my process of jeweling the inside of the liners of the "Guardian" knife, so I won't repeat it here. Here's a link if you missed it Jeweling Liners. It's a subtle detail since you have to look inside the knife with just the right light in order to even see it, but I think it's worth the effort. But, it is quite visible at the thumb release part of the lock bar.
With the liners polished and jeweled, it's time to give them some color. Titanium is truly a wonder of nature. By passing electrical current through a bath of electrolyte, titanium builds up layers of titanium oxide. By varying the voltage, the thickness of the oxide layer is controlled, producing different colors. Mr. Titanium explains this very well on his website at Mr. Titanium if you are interested in the science of the process.
My setup is fairly basic. At the right of the above photo you can see my DC power supply. The negative lead attaches to a sacrificial piece of steel suspended in the electrolyte bath. This particular piece of steel happens to be a messed up liner from the very first folding knife that I ever made. A piece of stainless steel would be better, but this hunk of O1 works just fine and holds some sentimental value. It's as though that first knife is imparting something of itself to all of its progenitors. Kind of cheesy, I know, but hey, I'm sentimental.
The positive lead gets attached to the liner that will be anodized. The bath is filled with electrolyte which is simply water and Borax laundry detergent mixed together to full saturation. In the upper left corner of the photo, you can catch a glimpse of a little color chart with listed voltages for the different possible colors. I have three or four go-to colors that I really like, but it's good to have possibilities to choose from. If you do your own anodizing, don't trust any chart explicitly. Each set up has different variables that effect the true voltage needed to achieve a desired result. Run a trial run with your set up and record the voltages that work for your process before you ruin all the hard work that you put into making your liners.
After a few seconds at 13 volts, this is what we get. I chose a nice bronze color that will go well with the red spacer behind the scales as well as compliment nicely with the colors of the mammoth. I feel it's very important to carefully choose your colors, textures and finishes that are used in a knife. I want the end product to be as aesthetically pleasing as it can possibly be. Like Hannibal used to say on the old TV show the A-Team, "I love it when a plan comes together." This is by far my favorite anodizing color.
Next up, the blade gets its 1500 grit, hand-rubbed, satin finish. The photo doesn't show it, but the spine and tang get a mirror polish for some added contrast and drama. That's a great looking blade if I do say so myself.
I fired up my new, shop-made electrochemical etcher and etched my mark into the blade. Man, I like that look! I've had many people ask me why I don't mark my blades. Now I can tell them I do. Maybe it will improve my name recognition along the way too. Classy!
Pictured here is the completed knife. I know you hear it all the time, but let me tell you, the picture really doesn't do this knife justice, and it looks pretty darn good in the photo! I missed taking photos of the fabrication of the thumb stud, so I'll be sure to include that in the next knife too. I have to say, that this is by far my best knife to date. The fit and finish is really nice and the knife opens and closes effortlessly. As I stated at the beginning of this post, I still need to put an edge on the blade. Once I do, I'll take some good photos with a better camera to show off the knife in its best light.
This has been a really fun build and I continue to learn with each knife I make. The great thing is that I have another knife sitting on my workbench that is just waiting for the detail work, which is the funnest part of knife building. I'll get back on that one if I have some time over the 4th of July holiday weekend coming up.
I appreciate you following along with me on my knife making adventures and hope you are enjoying your visit. Thanks for stopping by the Robinson Edge.
- Brandant Robinson
Monday, June 22, 2015
Almost There!
I was able to sneak in a few hours out in the shop this last weekend. Not as many as I would have liked, but at least I made some good progress. During those few hours I was able to get one of the two knives that I have on my bench almost complete. Here is what I was able to get done.

I use a shop-made file guide attached to the tang of my blades in order to keep the plunge lines symmetrical. I rest the spine of the blade on the tool rest as I draw the blade across the belt. I use to grind without the work rest, but I've found that I can get much better, more even results if I use the rest.
Here's the blade after the grinding is complete. It's almost at a mirror polish, which will make the hand satin finish easy to achieve. Without a doubt, this is the best hollow grind that I have been able to achieve to date. I'm very excited with how this little blade turned out. I still have a lot of work left to polish and satin finish this blade, but that will all be done by hand.
One of the last things that needs to be done before final finishing is to cut and fit the lock into the liner. I've shown this before, but my process for doing this is to blacken the liner with a black marker at the area of the lock, mark where the blade tang is in the open position, and scratch a line with a razor blade. The photo above shows the liner ready to be cut.
Here's the liner after the lock bar has been cut. The next series of steps involves filing the lock face until it engages the tang in just the right position, setting the detent ball into the lock, and drilling the detent hole in the blade tang. I didn't get any photos of these steps, but I will try to get some pics with the second knife.
Here is the knife completely assembled. I'm really please with how this little knife is turning out. It has a solid lockup, the blade centers perfectly between the liners, and the detent ball snaps the blade shut really well. You can also see that a thumb notch has been cut into the front liner, bolster, and scale, in order to make disengaging the lock possible with one hand.
This knife is getting close to the finish line. Only a few more things left to do including putting the finishing treatment on the blade and handle, etching the blade, and anodizing the liners. Thanks for stopping by the Robinson Edge.
- Brandant Robinson
Tuesday, June 16, 2015
Electro Etcher
I didn't get much knife building done last weekend. I spent most of my time building a new toy for me to play with in the shop. I've often admired the look of other folks makers marks etched into their nice, shiny blades. They always have a clear, professional look to them. I decided that my knives could use this too, not to mention it would give my blades a little better name recognition. So, I went to the internet in search of an electrochemical etcher that would suit my needs. There are many good etchers out there, but all were a little more than I wanted to spend on such a machine. My continued research led me to the website of Chris Crawford, a well-known knife maker in the custom community. On his site I found plans to build your own etcher for much less than the cost of a commercially available model. I downloaded the plans and the shopping list and headed to my local Radio Shack.
After a few short hours of drilling, stripping wires, and soldering, I ended up with something that very closely resembles an electro etcher.
I worked with a fellow who makes stencils for etching and came up with a design that closely resembles the mark that I have put on my woodcarving knives for years. I really wanted to have my full name on the mark, but with a long name like mine, and a small area to mark like a folder blade, that just didn't work out. I'll probably still continue putting my signature on the back spacer. That way there shouldn't be any doubt as to who the maker is.
Once I received my new stencils in the mail, I put the etcher to the test on an old throwaway blade. Here is the results.
The last photo above of the blade is a little out of focus. The etched image is actually fairly crisp. It does have a little frosting or ghosting around the edges, but I think that is due to the quality of the finish on this blade (only a 120 grit). I will play around with different techniques and try to dial in the process before I try etching a finished blade. All in all, I am quite pleased with the results and look forward to seeing a finished knife with my mark etched into the blade.
Thanks for stopping by the Robinson Edge.
- Brandant Robinson
After a few short hours of drilling, stripping wires, and soldering, I ended up with something that very closely resembles an electro etcher.
I worked with a fellow who makes stencils for etching and came up with a design that closely resembles the mark that I have put on my woodcarving knives for years. I really wanted to have my full name on the mark, but with a long name like mine, and a small area to mark like a folder blade, that just didn't work out. I'll probably still continue putting my signature on the back spacer. That way there shouldn't be any doubt as to who the maker is.
Once I received my new stencils in the mail, I put the etcher to the test on an old throwaway blade. Here is the results.
The last photo above of the blade is a little out of focus. The etched image is actually fairly crisp. It does have a little frosting or ghosting around the edges, but I think that is due to the quality of the finish on this blade (only a 120 grit). I will play around with different techniques and try to dial in the process before I try etching a finished blade. All in all, I am quite pleased with the results and look forward to seeing a finished knife with my mark etched into the blade.
Thanks for stopping by the Robinson Edge.
- Brandant Robinson
Tuesday, June 9, 2015
Purchasing Options Upgraded
If you happen to visit my "Available Knives" page (just click the tab at the top of this page) you will notice that I have streamlined the procedure for purchasing one of my knives. Those wishing to make a purchase may do so immediately by clicking the "Add to Cart" button found below each available knife. This will take you to a check out page where payment may be made by PayPal or credit card. Of course, I will still accept payment by personal checks or money orders, but with electronic payments, you will receive your knife much sooner.
I hope this makes the purchasing process easier and more convenient for everyone. And don't forget to sign up for the Email Subscription. Subscribers will receive email notifications each time a new knife becomes available and notifications of sales. Don't worry, I'm not going to inundate you with a bunch of emails all the time. I only send out emails when new knives are available or when prices are changed. Details on how to join are found at the top right of this page.
A big thanks to everyone for your interest in my work and for stopping by the Robinson Edge.
- Brandant Robinson
I hope this makes the purchasing process easier and more convenient for everyone. And don't forget to sign up for the Email Subscription. Subscribers will receive email notifications each time a new knife becomes available and notifications of sales. Don't worry, I'm not going to inundate you with a bunch of emails all the time. I only send out emails when new knives are available or when prices are changed. Details on how to join are found at the top right of this page.
A big thanks to everyone for your interest in my work and for stopping by the Robinson Edge.
- Brandant Robinson
Subscribe to:
Posts (Atom)