I enjoyed a nice leisurely weekend without a lot of chores around the house to cramp my style. I was able to spend a fair amount of time in the shop working on my current project, the "Pride" knife. As I mentioned in the previous post, I am going to try a few things differently with this knife that I haven't tried in the past. I sure hope things work out the way I have envisioned them. With that said, let me show you what I was able to accomplish.
We left off last week with the knife temporarily assembled and the profile of the knife completed. The next step was to begin the process of shaping the handle. Using the slack belt attachment on my grinder, I began rounding over the corners of the handle, softening the angles to give the handle its basic geometry. The pins that I used to hold the knife together are sacrificial in nature and after the knife was finished to the point of the photo above, were driven out of their holes and discarded so that the knife could be disassembled again.
Here is a quick photo of the blade after it has been hand-rubbed to a nice 600 grit satin finish. The next step that happened was to etch my logo into the blade. I didn't get any pics of that process, but you can scan back a few posts and see how I do that if you are interested.
With the blade finished, I went ahead and polished the inside of the back spacer to a mirror finish and set the detent ball in the lock bar. That completed the "guts" of the knife, leaving it ready for permanent assembly with peened pins. In order to help lock the pins in place, the holes through the scales get tapered slightly. I don't have a tapered reamer, so I just used a countersink and just "kissed" the holes lightly, just enough to flair the lip of the holes. This flair on each side of the pins endures that the pins will not move out in either directions. They are effectively locked into place.

Here's a really blurry picture of the pivot system. If you cross your eyes and stand on your head, you may notice that the standard threaded barrel pivot is replaced by a piece of 1/8" 416 stainless dowel rod. The pin passes through the bushing which is just a tiny bit longer than the width of the blade plus the two washers. In theory, the bushing should keep the pivot from over tightening during the peening process, allowing for the blade to swing freely on the pivot.
The innards of the knife get assembled and screwed together one last time and the mechanics of the knife tested. Once the scales are peened on, there will be no opportunity to make further adjustments, so everything needs to be working flawlessly before proceeding. To make sure that there is no gaps between the liners and the scales, each mating surface gets a final lap on my surface plate with 220 grit paper. Notice that the blade has been wrapped with tape to help protect the finish.
We are about to the point of no return at this stage. The knife has been assembled with permanent pins in place and I'm bolstering up my courage to start smacking it with a hammer. It seems a little crazy to beat on something that took so many hours to create where a single slip could spell disaster. Needless to say, this is a very nerve-wracking thing to do. It's definitely not for the fainthearted.

Success! Man, that was scary. My hat is off to all those slip joint makers out there who do this on a regular basis. Those folks must have nerves of steel. Anyway, I got the three pins all peened in place and expanded to fill the tapered holes. The great thing is, the bushing did indeed keep the blade from binding. I have a knife in my drawer of shame from a year or so ago that was overpeened, drilled out and overpeened again, and repeated twice more. Not a pretty sight after all that abuse, but a strong reminder of how NOT to do things. I'm so glad that this system worked for me on this knife. The folding action is a little bit snug, but it still swings smoothly. I can live with that. Next time, I'll add a couple thousandths to the bushing length to solve that.

The test of a good job in peening is how the pins look after they are ground off. If done right, they blend right into the other material and simply disappear. The above photo shows the knife after a spin on the slack belt at 120 grit. Can you find the pins? Me neither. Sweet!
Here is a progress pic of the knife at about the 320 grit stage. All sharp edges are rolled over and the surface of the scales begin to blend into a nice, even curve. You may be wondering what that divot is in the bottom of the handle. No, that's not a "whoops" it's a small groove that will direct the user's thumb to the blade's thumb stud to aid in opening the knife.
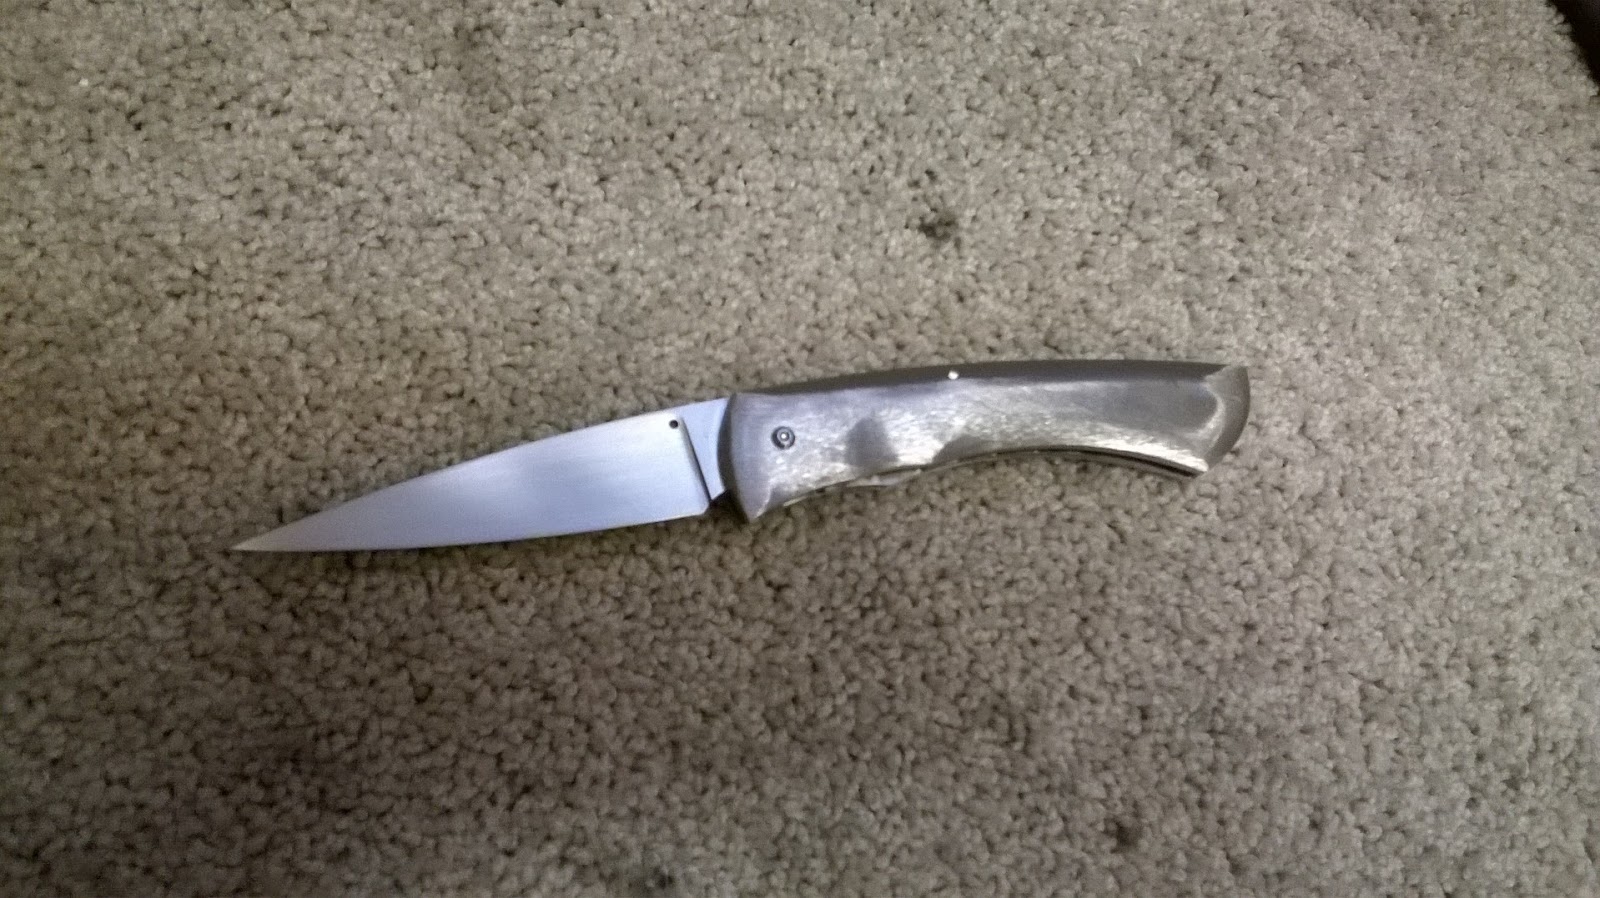
Here is a final pic of where I got to before leaving the shop. The handle has been finished up to a 1500 grit finish which will be hand rubbed back to 600 grit to match the finish on the blade. Before that happens though, I plan to do some carving and texturing on the scales. I think this knife is working out really well and should be something a little different than my usual work. It feels really good in the hand too. It should make someone a really fashionable piece for their pocket or their collection.
Once again, thanks for following along with me on this build and for stopping by the Robinson Edge.
- Brandant Robinson


No comments:
Post a Comment